
Content
Where to, where to, where to?
Where to put the spare wheel? - Where to put the bikes? - Where to put the SUP, the neoprene?
Rear carrier system
Already with Hector, BUTCH's predecessor, the Logo rear carrier from VW on the one hand. - On the other hand, we have also become aware of its weaknesses. The advantage of this design is that this carrier is not mounted on the trailer coupling and does not get in the way off-road or when opening the tailgate. This is because this model is mounted directly on the tailgate. The disadvantage is that the Logo rear carrier is just a bike carrier and not a sophisticated rear carrier system.


Modular rear carrier system:
The whole thing not only seemed a bit adventurous, it was. Not something you can recommend with a clear conscience. So we had a little look around. We quickly found the website of Terranger. Unter der Beschreibung „Heckträgersystem, modular, flexibel, nachrüstbar!“ fand sich schnell das Gesuchte. Eigentlich genau das, was wir suchten. In unserem Blog – „Who invented it“ – hatte ich ja schon ein wenig hierzu berichtet. – Dennoch was für Preise? – Ich fand das Ganze erst einmal viel zu teuer. – Das muss doch preiswerter gehen. – Also weitersuchen. – Bei Gmb-Mount we discovered a cheaper solution, but not one that convinced us personally. - But this was above all our first, personal and purely subjective impression. This variant is also based on the rear carrier logo. The basic price seems attractive. We were reluctant to spread our load over just two aluminum cross profiles. Just form your own opinion.
Gas struts:
Doch wir fanden auf deren Seite etwas anderes. Mehr Last bedeutet vor allem auch mehr Gewicht auf der Heckklappe. Deshalb war von Anfang an klar, wir wollen auch die Gasdruckfedern verstärken. Hier fanden wir ein auf den ersten Blick super klingendes Angebot. Diese bieten hier einen Satz „Gasfedern für Heckklappe inkl. Verstärkungen – 2x 2000 N – Einstellbar“. – 2000 N sind 500 Newton mehr, als z.B. Terranger dies anbietet.* – Auch der Preis schien durchaus attraktiv. – Also haben wir zugeschlagen. Ob dies die richtige Entscheidung war, gilt es noch zu klären. Der Karosseriebauer der Kfz- Werkstatt unseres Vertrauens, hat uns schon mal, sehr nachdrücklich gewarnt. Die o.g. Verstärkungen wären auf Dauer nicht ausreichend, um die auf die Heckklappe wirkenden Kräfte ausreichend aufzufangen.
Vielleicht resultiert daher der höhere Preis auf der Seite von Terranger. Auf jeden Fall, wirkt deren Haltesatz für verstärkte Gasfedern deutlichst massiver. *Zitat der Firma Terranger: „1500 Newton sind das maximale, was wir uns und der Heckklappe zur Zeit zutrauen“ – Doch da war unser Dämpfer schon gekauft und montiert. – Auch die Bezeichnung einstellbar ist eindeutig zweideutig. Gewünscht hätte ich mir eine Gasfeder bei dem, wie beim Fahrrad, durch eine Luftpumpe der Druck flexibel angepasst werden kann. So wäre man variabel und unabhängig. Insbesondere falls mal kein Träger montiert ist. Bei der erworbenen Variante kann man lediglich Druck einmalig ablassen. Also Terranger, GMB-Mount & Co., hier gäbe es Nachholbedarf.
Do it yourself or original?
Also doch einen DIY – sprich ein „Do it yourself“ – Heckträger? Dank @nurmalkurzraus fand ich auf seinem Instagram Account ein paar nützliche Tipps. Jetzt bin ich nicht gerade der klassische Metallbauer. Doch wofür hat man einen großen Bruder? Noch dazu einen mit Kompetenz in Stahl, Dank DHMhis own metal construction. A plan quickly emerged: take suggestions from @nurmalkurzraus, Terranger & Co, modify them and make them as inexpensive as possible. - So much for the plan.

Work steps:
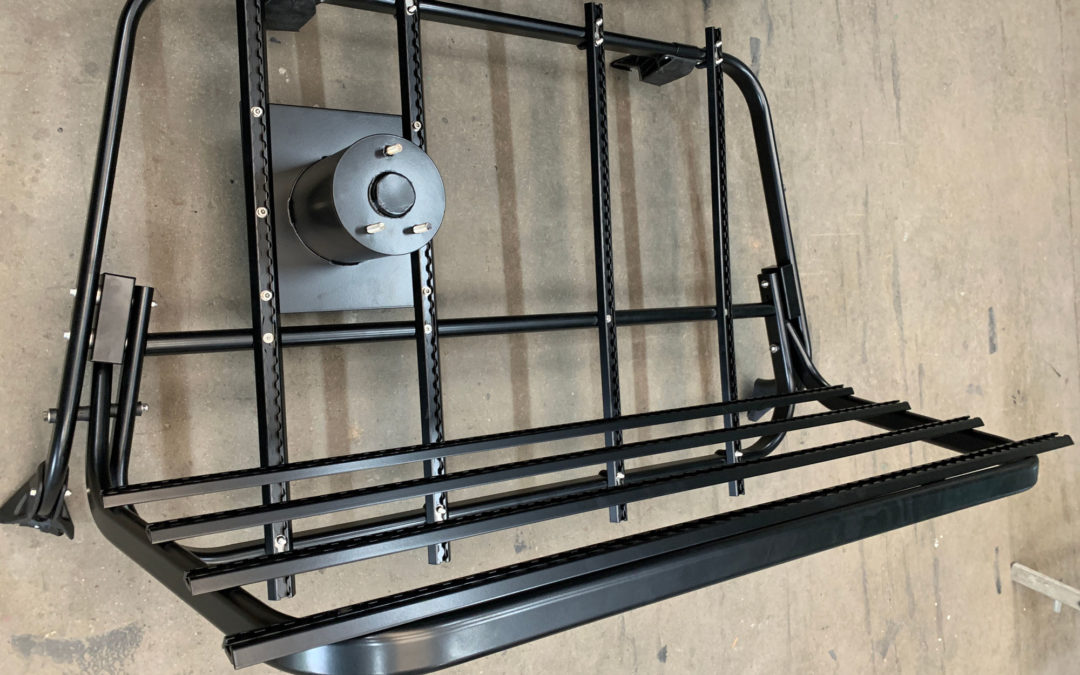
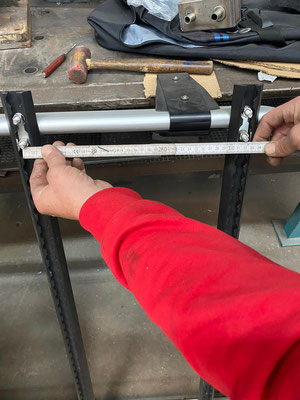
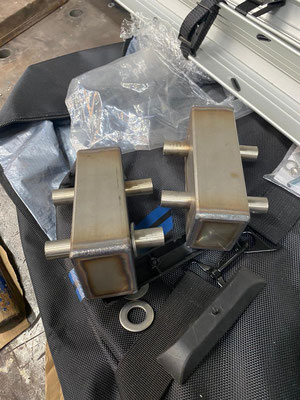
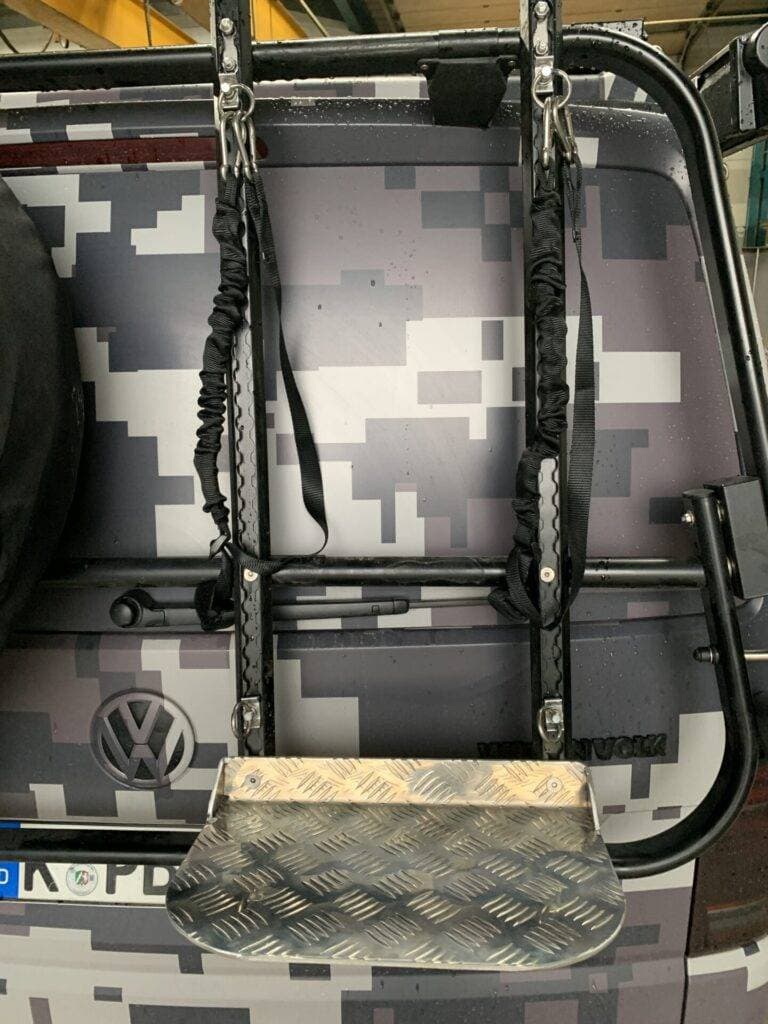
What has become of it? - First, the rear carrier with the name Logo was ordered directly from VW. - Where there's a logo on it, there's a logo in it, right? - There was a logo inside, but the wrong logo. So watch out, there is a second, newer version. It costs the same as the old one. But new does not necessarily mean better. This form was unsuitable for our purposes. So we returned the whole thing. A few days later, we finally got the right one. About the company relleum design we ordered airline rails. The owner, Mr. Dirk Müller-Paul, not only provided competent advice, but above all delivered quickly. Already powder-coated on request. - The next step was to dismantle everything. Drilling holes in the rails and fixing them with Stainless steel U-bolt with M 4 thread.
To make dismantling and thus possible theft more difficult, anti-theft nuts from the company Toolcraft for use. The plastic brackets were replaced with stainless steel ones. To create more stability between the aluminum frame and the lashing rails, an additional transverse stiffener was fitted. Finally, a spare wheel support module was added.
Now it was time to dismantle the whole thing again and take it to the powder coating department. This was done at Pajak powder coating in Würselen. We found the service to be fast, good, competent and, above all, reasonably priced. Finally, they put everything together again and installed it. I am delighted with the result. Thanks to the support of my brother, everything turned out just as we had hoped.

Conclusion:
My brother and I came to a clear conclusion: There is a reason why a rear carrier system like the one from the company Terranger zwar auf den ersten Blick teuer wirken, doch vielleicht auf den zweiten Blick viel preiswerter sind, als zuerst gedacht. Hier steckt viel mehr Kompetenz und Entwicklungsarbeit drin, als zuerst vermutet. Hinzu kommt, dass ein solcher Umbau mit deutlich mehr Arbeitseinsatz verbunden ist, als im Vorfeld gedacht. Ich bin von unserem Heckträger durchaus überzeugt und dennoch muss ich eingestehen, dass Details beim Terranger Heckträgersystem besser gelöst sind. Wer also viel handwerkliches Geschick mit bringt oder wie ich einen Bruder mit Metallbau besitzt, kann sich durchaus an einen DIY – Der „Do it yourself“ – Heckträger wagen. – Allen anderen empfehle ich, lieber ein wenig mehr Geld in die Hand zu nehmen und sich für das Original zu entscheiden.
Addendum:
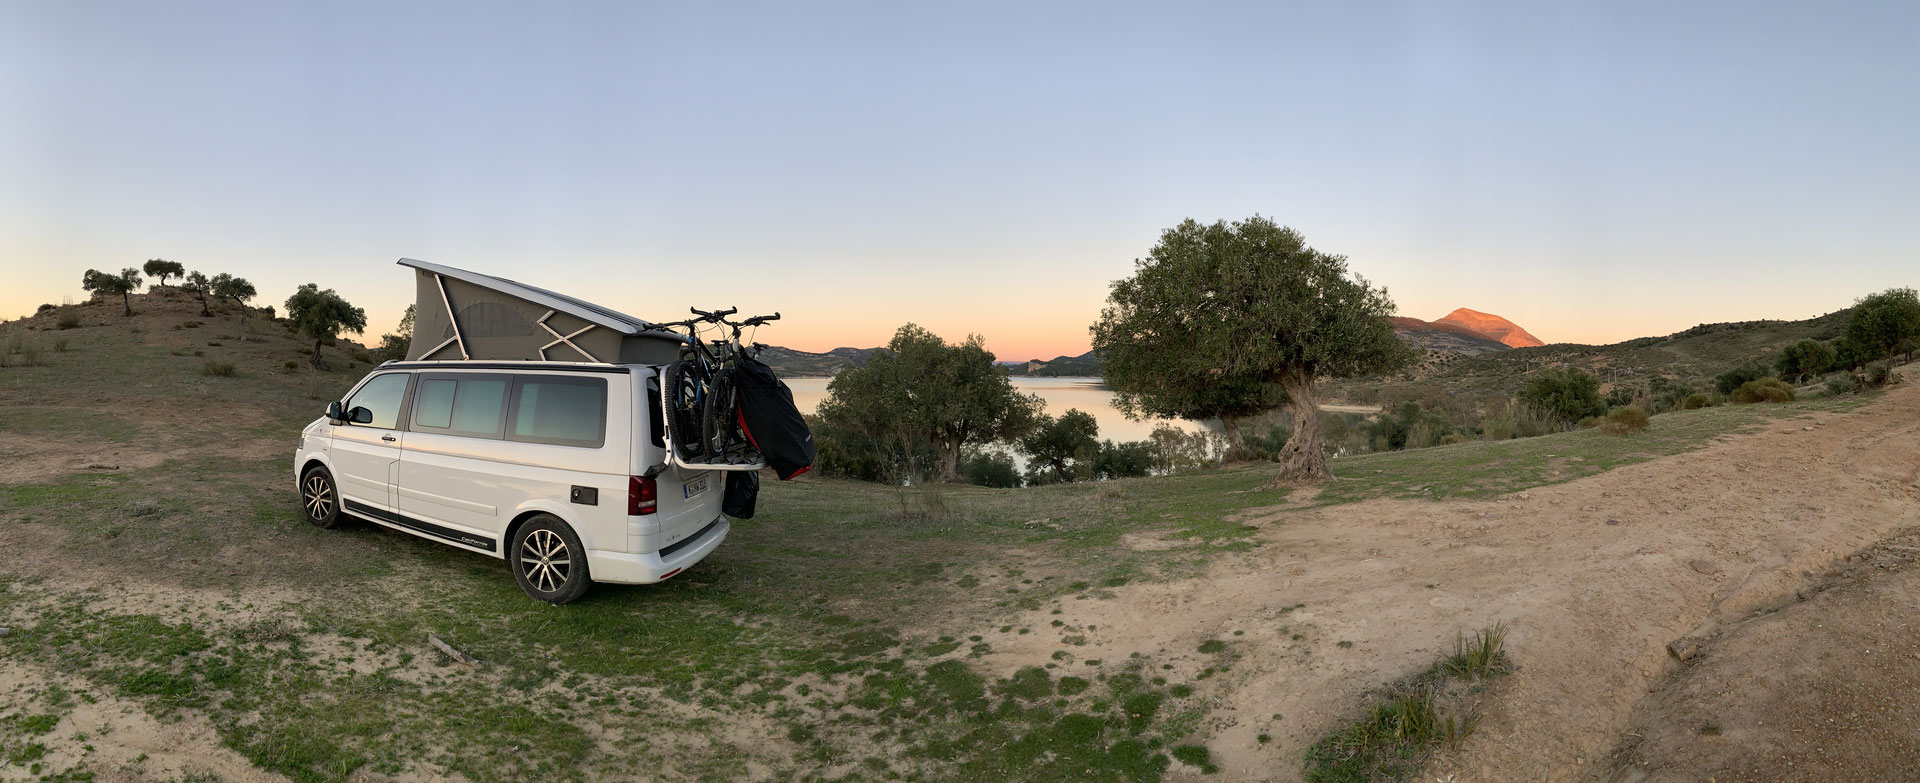
Even though we installed shock absorbers reinforced to 2000 Nm, the weight of the tailgate, including the folding bikes, was simply too high to keep it up. That's why we came up with a new interior concept in which the folding bikes are at the back of the interior. We have Ben, one of the managing directors of SpaceCamper, to thank for this. The logical consequence: a new conversion of the rear rack. The folding bike frame is no longer required. Instead, a retaining plate was developed for our SUP bag.
We deliberately decided not to powder-coat the aluminum plate, as this is not visible when the bag is fitted. This not only makes our rear end look more harmonious, it also makes the vehicle approx. 25 cm shorter. This has two advantages. It is easier to find a parking space and the potential danger for cyclists is reduced. If in doubt, you can now ride against a padded bag instead of a black aluminum frame. Once again, we would like to thank the professionals at DHM - Competence in steel.
PS: Here you can find our SpaceCampers Equipment details, our SpaceCamper Expansion, the SpaceCamper Detailausstattung „Last Call“, as well as SpaceCamper Insider tips.
Here our TERRANGER Offroad modifications, info about the topics Terranger off-road driving training, Energy management, DIY Water tanks, Vehicle Security & Anti-Theft, pit stop at delta4x4, Sand sheets, Vehicle foiling and Ceramic sealing.
To round off the topic Product piracy with offroad tuners.
The topics Packing list, Tips & Tricks, BUTCH & Friends, Home port, the Travel blogs, the subject HAPPINESS MUSCLE as well as About us we have dedicated separate sections. You can contact us here.
Und last but not least hier unsere Linkübersicht „Follow the Sun„. Damit ihr wisst wo man uns noch folgen kann.
You will find your way around. ? If you like the posts, tell and share it, thank you!


How do you do?
I find your site great and inspiring. I would like to build a rack system like yours myself and have a few questions regarding the crossbar you use to reinforce the bike rack: Is it a tube or solid bar? what diameter is it? and how did you manage to drill with an angle that is not straight?
Many thanks for your support
Hi, it's an aluminum tube. - As I said, although I had the support of my brother's metal construction professionals, I wouldn't tackle the project again.